Showing posts with label studio furniture. Show all posts

Tuesday, April 9, 2013

Easy Tips to Organize your Studio Space

When we moved from Maine to Vermont and rented a house I was faced with creating studio space to work in. The house has a 20X27 great room off the kitchen and what used to be the living room in front of the house.

We decided that the old living should be my studio due to the size and amount of natural light it has with the 2 good size windows. In the center of one wall there are shelves, although they are very shallow. In my house in Maine I used cork boards with all my gems and pearls and that worked very well. I have my seed beads in tubes in tin cans (I like to re-use when possible) and I liked that as well. I have them separated into colors and sizes. In a rental house I had to be careful with anything I did, making sure I could restore it when we leave. I also wanted to be able to hide the shelves and corkboards as it is the first room you come into.

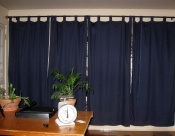
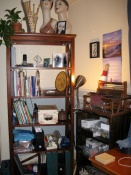
The narrow shelves turned out to be perfect to line up my seed beads on and made it easy to separate them by size with the #15’s on one shelf, #11’s on the next, and so on. I hung my corkboards on either side of the shelves. I wanted to be able to hide that whole set up and protect the gems, beads form light as well. I went out and bought a large curtain rod and panels of curtains. Blue is not the color I would have chosen, but I had to work with the wallpaper that is already there because, like I said it is a rental. The white panels were to sheer.


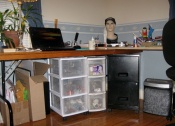
For my workspace I had some challenges. In Maine my husband built me a table that I could use as a sit/stand and I have a drafting chair that was perfect. The thing about those chairs though is that they do not go low enough for a normal table height, missing by just a couple of inches. I had (2) 7 foot tables but they were too low to work one for hours at a time. To remedy this we went out and purchased some beautiful Birch plywood and I arranged the tables in a “U” shape. This enables me to have my computer nearby, my workspace in front of the window and my light tent just to the right of my workspace.

I purchased a bookcase and have all my crochet/knitting books, beading books and some other storage space. In the closet are my tubs full of yarn, my gift boxes and other miscellaneous items.

Under one table I have my shredder, file cabinet, storage for completed pieces and other supplies that I use often. A smaller bookcase at the end of that table houses tubs (plastic salad containers) full of other supplies such as lampwork, acrylic flowers and leaves, Swarovski crystals and pearls, etc…

On the table to my right I have my light tent, shipping station, paper cutter and other larger tools I use often. I do have some plants around just to keep things fresh and like I said there are 2 good size windows for sunlight and scenery.


I will be happy when the house in Maine sells and we can look into buying a home in Vermont. For now though, this works great and I did not change anything making it very easy to move it all without having to do any repairs to the rental.

Meanwhile, come hang out with me at Divella Delights!


Friday, February 27, 2009

The Vase Continues

Not much progress has been made for the last couple of days due to my back and hip being out of whack. That will surely change now that my husband bought me a wonderful new drafting chair to work on. When I sat on it I wanted to roll it home! We re- organized my studio so the computer is on a table the same height as my work table so I can get rid of that old metal folding chair and use this new one at the computer as well.
The vase is certainly a challenge for me but lots of fun at the same time. I have learned a lot doing this one and there is a part of me that wants to take it all apart and start over. The fact that I have found these vases fairly cheap may prevent that but the part of me that is OCD says otherwise. I find myself looking around at other items I can bead over so I certain this is an addiction. Think there is a 12 step program for beaders? I may need it soon.
I had someone ask why I did not bead the top, here is why: the vase begins at the smallest part and when I am finished beading down and get the bottom finished I will then go back to the top and finish it up over the lip.
Well, I am going to roll on over to my work table and get to it...more tomorrow!

Thursday, February 26, 2009

Peyote Stitch Trials

This is a lot of fun, although quite painful. My hip is not well this morning so my mission today is to find a drafting chair or something similar that will give me the height and some good support. This chair is just not good for my back. I have a pain in my shoulder as well which I suspect is due to the chair as well.
The vase is coming along and is quite addictive. I am learning some things about peyote stitch in the process and this is probably a vase I will keep. A couple of hints for anyone who wants to do one of these:
1. Keep your increases several beads away from a step up if you can
2. Never increase near a square bead.
So what I have figured out is that when I see an increase coming I have to plan more carefully.
I also cruised around and found a good price on glass vases...told you it was addictive. I am going to wait until I finish this one, I am a little spooked by the top and bottom.
The bottom I know has to be all the same size beads so I figure about 1/8" from the bottom I will switch to all the same size, probably #8. I am not good at decreases yet but this will surely give me practice! As for the top that should not be that bad...invert the vase and bead down over the lip and decrease a row. Sounds easy, we'll see.