Showing posts with label studio space. Show all posts

Tuesday, April 9, 2013

Easy Tips to Organize your Studio Space

When we moved from Maine to Vermont and rented a house I was faced with creating studio space to work in. The house has a 20X27 great room off the kitchen and what used to be the living room in front of the house.

We decided that the old living should be my studio due to the size and amount of natural light it has with the 2 good size windows. In the center of one wall there are shelves, although they are very shallow. In my house in Maine I used cork boards with all my gems and pearls and that worked very well. I have my seed beads in tubes in tin cans (I like to re-use when possible) and I liked that as well. I have them separated into colors and sizes. In a rental house I had to be careful with anything I did, making sure I could restore it when we leave. I also wanted to be able to hide the shelves and corkboards as it is the first room you come into.


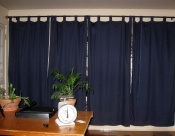
The narrow shelves turned out to be perfect to line up my seed beads on and made it easy to separate them by size with the #15’s on one shelf, #11’s on the next, and so on. I hung my corkboards on either side of the shelves. I wanted to be able to hide that whole set up and protect the gems, beads form light as well. I went out and bought a large curtain rod and panels of curtains. Blue is not the color I would have chosen, but I had to work with the wallpaper that is already there because, like I said it is a rental. The white panels were to sheer.


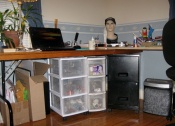
For my workspace I had some challenges. In Maine my husband built me a table that I could use as a sit/stand and I have a drafting chair that was perfect. The thing about those chairs though is that they do not go low enough for a normal table height, missing by just a couple of inches. I had (2) 7 foot tables but they were too low to work one for hours at a time. To remedy this we went out and purchased some beautiful Birch plywood and I arranged the tables in a “U” shape. This enables me to have my computer nearby, my workspace in front of the window and my light tent just to the right of my workspace.

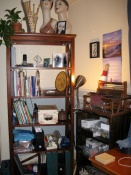
I purchased a bookcase and have all my crochet/knitting books, beading books and some other storage space. In the closet are my tubs full of yarn, my gift boxes and other miscellaneous items.

Under one table I have my shredder, file cabinet, storage for completed pieces and other supplies that I use often. A smaller bookcase at the end of that table houses tubs (plastic salad containers) full of other supplies such as lampwork, acrylic flowers and leaves, Swarovski crystals and pearls, etc…

On the table to my right I have my light tent, shipping station, paper cutter and other larger tools I use often. I do have some plants around just to keep things fresh and like I said there are 2 good size windows for sunlight and scenery.


I will be happy when the house in Maine sells and we can look into buying a home in Vermont. For now though, this works great and I did not change anything making it very easy to move it all without having to do any repairs to the rental.

Meanwhile, come hang out with me at Divella Delights!


Thursday, September 10, 2009

Beading Studio on a Shoestring

I have found a great use for some bulletin boards that were headed for the garbage by a local company. Hardly used but not too pretty they were going to throw them away and replace them with some more modern and attractive models.
I was always digging through bins and drawers to find my pearls and gems and I never really knew what I had or needed. I put the bulletin boards up in my studio and started pinning my treasures in small plastic bags, many of which are the bags they came in. I also have a box for retired bags so I always have plenty on hand. Now in addition to being able to see what I have, I feel much more inspired and I can just go around the room and pick what I want off the board. In addition to that now that those are on the walls I have more space on the shelves.
My seed beads are on shelves by size and color so they are also in plain site.
I use the large plastic salad containers to organize my thread and lightweight stringing material and tin cans to hold tubes of beads, again organized by size and color.
The drawers that used to hold my beads now hold fibers and other stringing materials (mostly for macramé) keeping them safe from the sun and lighting that can fade them.
I hope someday to be able to get some sort of sliding wall to put them on so I can close them when I am not using them to keep them from the light and be a little more attractive but for now this works very well!

Cold weather, Hot flashes and Beading

Cold weather, Hot flashes and Beading
Being comfortable and hassle free is important to me when I am working. I spend much of the day in my studio either working or learning new techniques and it is difficult to regulate my internal thermometer as I go through the trials of menopause.
As the temperature dips and we enter the cold weather season I am reminded of a handy little tip that I came up with last year while trying to bead with a flannel shirt on. The thread likes to grab the buttons and causes problems for me. I like to keep it a little cool in my studio but sometimes it gets just cool enough that I need another layer but not enough to turn up the heat.
Now, I could wear a sweater or sweatshirt but this poses a problem for me which a few of you will understand. There are times when I have to quickly take off the outer layer. All of you who are there, or have been know how hard it is to regulate our body temperature and how quickly it can change! I got angry one day and cut off all the buttons on one of my shirts and this works very well!
Now I keep this shirt in my studio to wear when there is a chill in the air. I can take it off quickly when my body turns up the heat and put it back on when I return to "normal" several minutes later. I actually have 2 shirts I have done this to, a flannel and a regular cotton denim shirt for times when I don’t need quite the warmth of a flannel. I just fold the sleeves up and I can continue beading without the interruptions.

Thursday, February 26, 2009

Peyote Stitch Trials

This is a lot of fun, although quite painful. My hip is not well this morning so my mission today is to find a drafting chair or something similar that will give me the height and some good support. This chair is just not good for my back. I have a pain in my shoulder as well which I suspect is due to the chair as well.
The vase is coming along and is quite addictive. I am learning some things about peyote stitch in the process and this is probably a vase I will keep. A couple of hints for anyone who wants to do one of these:
1. Keep your increases several beads away from a step up if you can
2. Never increase near a square bead.
So what I have figured out is that when I see an increase coming I have to plan more carefully.
I also cruised around and found a good price on glass vases...told you it was addictive. I am going to wait until I finish this one, I am a little spooked by the top and bottom.
The bottom I know has to be all the same size beads so I figure about 1/8" from the bottom I will switch to all the same size, probably #8. I am not good at decreases yet but this will surely give me practice! As for the top that should not be that bad...invert the vase and bead down over the lip and decrease a row. Sounds easy, we'll see.

Monday, August 25, 2008

Creating a new studio on a dime


Well, not a dime exactly, but really cheap. My studio space used to be 9x12 with no closet space and I needed more room as I expanded to different mediums. I went upstairs into this old room. First thingI did was rip up the old carpet. I forgot to take photos before I began but the room I re-made was the color of the trim in the first photo...brown. Walls, trim, floor, everything brown...YUK. So I bought a gallon of KILZ primer and primed the entire room. Then the walls went white, one gallon and the trim two-toned sage (my favorite color)...1 quart of each. The room had one outlet and with all the lights, computer, sewing machine, etc I needed more so my wonderful husband put this room on it's own circuit and put in additional outlets. We put OSB on the floor to prepare for hardwood flooring at a later date, and a fixture track lighting unit, those are way cool! So far $157.20.

I looked around at the old furniture and scrap wood that has been downstairs for 6 years or so and came up with all my shelves, tables etc...still $157.20. My new studio is 10x13 with built in drawers, closets and cubby holes. Much more storage and lots of wonderful well lit space to create in.
Now all of my yarn is on drawers as are all my office and packing supplies. My gems are hung on the same old corkboards so I can see them and my beads are all neatly arranged by size and color so I can spot those easily too. My sewing stuff is in the closet which we took the doors off of and put shelves in. My table is now in the middle of the room which allows me to have have different stations around the table...general beading station with a separate design area; wire jig, hammering, you get the picture. I just love it!! So for $157.20, one weekend and a trip to Home Depot I have a beautiful new studio. Now I have to get to work!!!

Wednesday, March 19, 2008

My Begnings


Welcome to my blog. I am fairly new to all this so please hang in there with me. My name is Dianne and I design and produce handcrafted gemstone and beaded jewelry. I know, so do a million other people. I think (and I have been told) that my designs are quite unique. I have been advised to have them professionally photographed for submission into various jewelry mags and such. I love what I do and they way I do it. I love the process and do not want to mass create. I really enjoy making one piece like no other. I guess I would not mind being published, but I am afraid that would take away from the spirit of it all. So at least for now I prefer to let those things come to me as they are meant to and not push the issue.
I have a little 12x10 studio at home where I can put on my Kenny G or other tunes and just create. My table is made from a 4x8 plywood and I have some old towels under a piece of cloth where I work so my gems are not rolling around. For shelves I have old bookcases and I have bulletin boards all over my walls for the gems so I can see what I have. So it is nothing fancy or elaborate but it works and it is comfortable. I know a lot of artists feel as though the surroundings in which one is inspired should have color and life and ta-da! I feel like those things get in the way when I am designing. I have some photos scattered around...my kids, grand kids and my mom who passed away nearly 3 years ago now. I have this really goofy photo of her and it reminds me not to take all this too seriously. She was a very distinguished lady and this picture is so out of character it cracks me up every time I look at it.!
The only thing I want to change is the floor. When I pulled up a corner of the carpet to run my computer wires I found the most beautiful hardwood floor underneath. Needless to say the carpet is going this Spring!