Beading tutorials can be a huge drain on your resources so I have decided to do a few blogs on some very good and some not so good beading tutorials for you.
While I have been beading for a while there are times when I am just uninspired and want to learn a new technique so I cruise around, usually on
Esty looking for something that catches my eye. The goal for me is to learn a new technique that I can later incorporate into my own designs. Perhaps a new stitch or a different way of adding a clasp.
When I first began beading several years ago I purchased a lot of books, DVDs and Tutorials because I was working full time and did not have the time for classes. I live a distance away from any classes that were begin offered.
What I have found is that until you are quite experienced you might want to invest in the time and money to take a class.
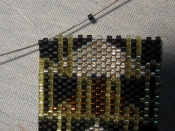
While the photos on the finished product look delicious and are described as very easy, I have found that it usually is not. I have recently purchased some very good beading tutorials as you have seen in my last blog and I highly recommend this artisan. A few days later I decided to buy this one
 and while the instructions were quite good and super simple for the "bead" I could not finish the earrings. I have been beading for quite some time and after an hour or so I finally gave up and decided it would have to be a small pendant. You see, the earwires were impossible to get between the beads and I destroyed 2 pair of sterling earwires trying. Now in all fairness to the artisan, she does mention that if you are an experienced beader you might want to add the earwire at the beginning. I like to go through the tutorials as if I am new simply because then I can direct beginners (family member, students, etc...) to those tutorials. A new student would have a really tough time trying to add the earwire at the end! Anyway, it was time to cut my losses, toss that tutorial, and add this artisan to a list of those I will not purchase from again.
It is my opinion that if you cannot properly finish a piece of jewelry making it becomes a waste of time and money. There is a large website dedicated to beading tutorials that rarely gives you complete instructions…although on most of them they do tell you that.
In order to help you in your search I have a few questions you should ask BEFORE you buy beading tutorials.
What level of experience should I have to complete this?
What materials and tools will it require?
Are the instructions complete from stringing the first bead to being able to wear it?
Is the seller available for questions should you have any?
If there is a question in your mind while you are looking at a tutorial...ASK!
The key when it comes to tutorials you are paying for is to ask questions BEFORE you buy it.
I will have more tutorial tips and questions coming up soon as well as some new really good beading tutorial buys!


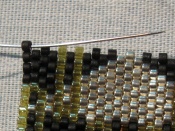
 then pick up your last
bead of the row. Take the needle under the thread on the edge .
then pick up your last
bead of the row. Take the needle under the thread on the edge .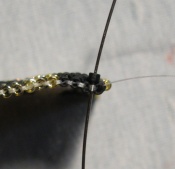 Now go bacj through the
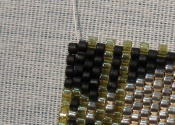
bead you just added to put you in the position for the following row.
Now go bacj through the
bead you just added to put you in the position for the following row. 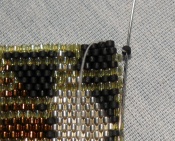 Pull snug, but not too
tight
Pull snug, but not too
tight 


