Friday, September 27, 2013

Replacing a Misplaced Bead in your Peyote Stitch Pattern


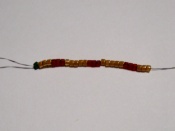
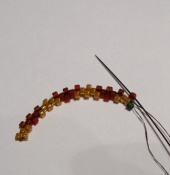
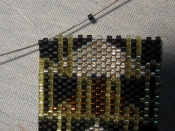
Have you ever reached the end of your peyote beading and realized that you have a misplaced bead? Perhaps you have broken bead somehow. There is an invisible way to repair or replace beads in Peyote stitched work and I will show you how. Do you notice there is a bead of the wrong color in the piece below? There is a green bead where the pattern calls for a yellow bead. There is a green bead where the pattern calls for a yellow bead. It is right there in the middle toward the bottom. Do you see it? We are going to remove that green bead and replace it with a yellow bead.
For Larger Photos go to Divella Delights!!

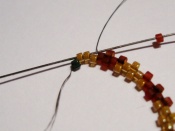
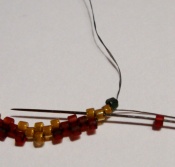
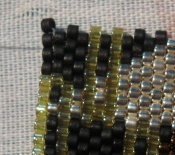
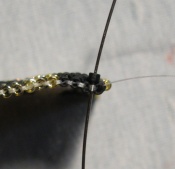
Slide your needle through the bead to be certain you want to remove as shown.
Now, take your pliers and carefully break that bead and remove completely. I usually just poke it through with my needle after I break it.
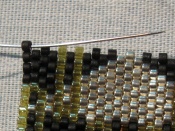
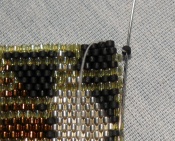
Now with the bead completely removed weave your way over to the bead just in front of the empty space.
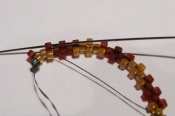
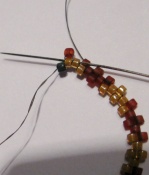
Pick up the correct bead in the pattern, in this case my yellow bead and go through the next 2 beads on the diagonal.
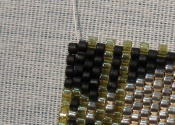
Turn and go through those beads again and the next bead on the diagonal going on the opposite direction form when you added the new bead.
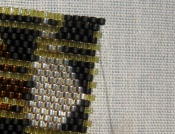
Weave in your end. Now, tell me which bead I replaced!


Thursday, September 26, 2013

Odd Count Peyote Demystified

Odd Count Peyote Stitch can seem rather daunting and I have not seen many really clear instructions on how to do that first odd turn, which is row 3. I find photographs easier to read than those silly bead diagrams.
I was beginning my Autumn Chevron so I though I would take some photos of the process, I hope this helps someone out there!
When you are working in Peyote Stitch, you string on the first 2 rows and begin working on the third. As you can see I have string on 25 beads, an odd amount.

Work the next row as you would even count, stopping before you add the last 2 beads. Pick up the next bead in your design (red) and go through the last 2 beads coming out at the end of the row. (The green bead is just my stop bead and not part of the design).

Turn your work...Pick up your last bead (red) and skipping one bead, go through the next bead and the UP bead following it.


Now turn around again and go through the bead sitting next to the one you just came out of.

Go through your last 2 beads again.

Now go through your last bead added (red).

Now you are ready to begin your next row, which will be even count.

The next Blog post will show you a couple of ways to make the turns at the end of the following rows of  odd count. Questions? Shoot me an e-mail at info@divelladelights.com
Stop by Divella Delights and see the 5 new peyote patterns I have just added! Great buy at $4.oo each!!

Monday, July 29, 2013

Felted Hats and Peyote Patterns


Vacation is over, now it is time to focus on some new Peyote Patterns and the hats for Fall/Winter 2013-2014 season!

I love this new pattern for felted hats and you can find it at Fiber Trends, although I must tell you that I had to do some alterations on the pattern to make it fit the adult size. My suggestion at the onset would be to use an 11 needle rather than the 10 ½ and do use the Lamb’s Pride. You might have to do some stretching even still. I like my felted hats felted tight so that you cannot see the stitches so I had to make some adjustments. If you are going to needle felt on it afterwards rather than using buttons/brooches you’ll need to adjust to make it a little larger so you can felt it down enough for the felting needles to go through without getting a lot of breakage.

I am in the process of designing some new Peyote Stitch Patterns so watch for those coming soon. Once I design the pattern I have to make the bracelet so it can be photographed and with each one taking between 6 and 8 hours it takes al little tine to get these on the website.

I had a wonderful reprieve and went to Boston for a bit to spend some time with my eldest daughter, a wonderful woman with a kind and living spirit. Prior to that I had the twins, now 10 for several days and there is no work when they are here! We did manage to make dream boards after watching the movie “The Secret”. I had no idea they were listening but they really picked up a lot.

While I was in Boston and the girls were at the Taylor Swift concert, my daughter and I watched the movie “Silver Linings”. My daughter and I both loved it…check it out if you have not seen it!

I had better get back to work. I have 2 hats drying now and am going to begin the first of the new Peyote Patterns.
Stop by Divella Delights to see all of my hat and jewelry designs!

Enjoy the day!

Thursday, July 18, 2013

Felted Patterns Gone Bad


Have you ever purchased a pattern and made it up only to find that the size, despite the gauge being correct was way off?

Now, I can correct most any pattern to make it work but the yarn I waste in the meantime frustrates me because if you knit or crochet you know yarn, especially wool yarn, is not cheap.

Here are some tips on felted patterns. I have come up with these suggestions as a general guide after much frustration.

When you buy a pattern and it calls for worsted weight yarn be very careful to look at the gauge. Even so, I suggest you knit a swatch and felt it to see if you get the correct felted gauge. Worsted weight is so general and can be anywhere from 3-5 stitches an inch...big difference in the finished product. Even if you are using the same yarn they did keep in mind that everyone felts differently depending on the techniques, machine, water temperature, etc...

Here is a pattern I used recently.
It is a beautiful hat but it was supposed to fit a 23 inch head...it is 16.5 inches on the inside! I will have to make major adjustments to this one, not so much in the length because it is not too far off but the circumference is a mile away! That kind of tells me perhaps something is amiss with the pattern but there are no corrections listed.
 
That brings me to another point. If you ever purchase a pattern, look to see if there have been corrections before you begin knitting/crocheting.
When I create a pattern I write it down as I go along. After I am finished I write up the pattern so it makes sense to the community then I make another item following the directions to make certain there are no typos. I have found errors in doing this so I am very happy I included that step.
Be careful when you are making a knit or crochet item to felt that you use the same brand/weight of yarn so they (probably) felt us evenly. Even still, you should do a small swatch to make sure. If you are using different colors you also want to do a sample first to make sure the colors will not run together. I have had very good luck with Cascade 220 & Lamb's Pride by Brown Sheep but Patton seems to bleed more and the color also fades more...for me anyway. If you are making a solid color item this does not matter. I really love the Cascade 220 yarns, they have a wonderful variety of colors and I get very consistent results. If I am making something in winter white or natural I really love the Fisherman’s by Lion Brand. If you have ever tried to felt light colors you know it can be challenging and often by the time you have the correct size there is a lot of distortion. This yarn does not distort and it felts really fast...5 minutes in the washer with hot water and Dawn. Most fibers take about 20 minutes which means setting back the agitation...you cannot felt in a front loader, you have to have an agitator.
For more information on beading, kitting or crochet see my blog at  Divella Delights

Saturday, June 29, 2013

Summertime Fun Beading Classes


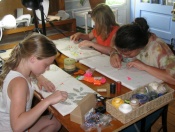
Allow me to introduce my 10 year old twin granddaughters, Dive & Ella and my 12 year old niece Kathryn.
For the next few days I will be teaching them a variety of beading techniques and trying to fit in some other fun as well.
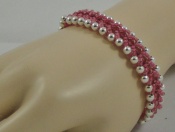
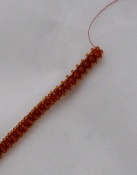
Today we did Shamballa bracelets and they are progressing well with their tiger stripe peyote stitch bracelets. Yesterday Kathryn taught us all how to make survival braclets and Diva will be teaching the crystal bracelets but she will be using round beads instead.

 I taught her (& she perfected) this technique earlier in the year and I told her then that she would be teaching this summer.
I hope you enjoy the photos from the classes and a variety of other activities we are going to take part in.
We did make it to the lake today for an hour of swimming but I forgot the camera.
Shamballa Class
Peyote Class
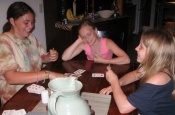
Relaxing with a game of cards
Today we have managed to make Shamballa Bracelets and they are progressing well with their tiger stripe peyote stitch bracelets.
Make sure to stop by Divella Delights for more updates!

Tuesday, June 25, 2013

Spooked by Right Angle Weave?

One of my daughters sent me some Agates for Mother's Day to use in my designs, breathtaking isn't it?!

After I bead embroidered around the Agate Cabochon, the only thing left was to figure out the neck. I really liked the look of Cubic Right Angle Weave but I have never taught myself how to work it up.
I have resisted learning Cubic Right Angle Weave for so long and today I have to wonder why. The only thing I can figure out is that when I first saw it there must have been something that seemed so daunting. For those of you who learn better by seeing rather than reading, this video is for you, fabulous & free.
It took me all of 15 minutes to get this down and once you do it goes very quickly!

I bead daily for most of my day so #11 beads were not a problem. If you ever have trouble learning a new stitch try it with bigger beads until you are familiar with the stitch. It also helps if you use different color beads for each new row so you can really SEE where you are coming from and going.
Have fun!
I post lots of little tips and tricks on my website at Divella Delights and also offer free peyote stitch patterns from time to tine

Friday, June 14, 2013

Watercolors for the Soul

Have you ever seen a painting that just reaches into the very depths of your soul?  I have grown up with a very artistic family. My mom is a watercolor artist, and Calligrapher while my sister is an Encaustic artist at present. She also dabbles in pottery, acrylic and watercolor. The boys expressed their creativity with landscaping. My uncle carved rocks into lovely creatures, and my dad made a even a day sailing adventure a meditation for the heart. While is used to paint Sumi-e, my passion and expression has drifted over to creating jewelry. You can see my designs at Divella Delights
 I have seen hundreds, if not thousands of works by my family, and I have been to many galleries over the years. I check into family sites every now and then and today I came across this painting that spoke to me in a language that I don't hear often. There are no words in this language, it just reaches in and caresses a part of you, the most tender, sensitive part of your soul and speaks a message that you can only hear at these depths.

Be kind to yourself today an enjoy all the beauty that surrounds you.
Penelope Culbertson

Tuesday, June 11, 2013

Heirloom Jewelry


Do you have an odd earring that belonged to your mom and grandmother? How about a treasured old button, a coin you brought back from a distant land while on vacation or your Honeymoon? How about one of your dad's old cufflinks that holds special appeal? Are you waiting for something wonderful to do with it? I have just the answer. It occurred to me while I was making these bead embroidered cuffs that I could just as easily use some piece of memorabilia for the focal piece in the center. At Divella Delights you can guide the process.

If you do not share my passion for bead embroidery, let me do it for you.  Just contact me at info@divelladelights.com and let's chat about your own special bead embroidered cuff!

Tuesday, June 4, 2013

New Directions!


If you have looked at my "Retired Designs" listings, you have noticed that many of my designs are being retired. After much thought, prayer and consideration, I have chosen a new direction for my website and my designs. I have had a lot of joy creating all of my work in the past 7 years but change is necessary!

I will be creating 4 major signature pieces a year to coincide with the seasons. They will be available for a limited time and I will be creating a limited number of pieces in each design. Because each one is made by hand, they will have subtle differences.

I will be doing more bead embroidery in cuffs and adding some necklaces using the same technique. I will also be creating more of the Peyote stitch patterns which will be made to order as the length of those are key to a good fit. The clasps will be made by me with a more elegant appearance.

I am very excited about the new direction I am going in, I hope you will too!

I have more changes in the works so make sure you stop in from time to time.

I will still be making my popular hats, not to worry. I will be limiting the amount I have on the site only because of the increase in Wholesale orders around the country. I will again not be taking any special orders this year.

I hope you'll stop by Divella Delights and check out the new changes and make sure to take advantage of the 60% off sale between now and then!

Sunday, May 26, 2013

Make those Odd Count Peyote Stitch turns easy!

There are 2 ways I have found to do that tricky little turn in Odd Count Peyote and I have tried to give you instructions with photos to help make your job easier.

The first is theone I prefer, mainly because it does not give you a tighter edge on the odd side.

The second will give you one edge that is tighter so you have to be careful not to pull too tight.

Here is the first:

When you get to the end of the odd count turn, do not pick up the last bead but instead go through the end bead below your current row.


Then pick up your last bead of the current row and go through the beas below again.


Go back through the bead you just added to put you in the correct position to begin the next row.


For the second method, gp through the last up bead in the current row then pick up your last bead of the row. Take the needle under the thread on the edge .

Now go bacj through the bead you just added to put you in the position for the following row. Pull snug, but not too tight
Make sure to visit my website Divella Delights for more tips and tricks; beautiful hand-created jewelry and hats!

Friday, May 3, 2013

Tiger Eye Bead Embroidered Cuff

I am working on a Tiger Eye Bead Embroidered cuff and I decided to use seed beads in amethyst and peridot along with some gold. I like the way it is turning out so far although I was not sure about those colors in the beginning. What are your thoughts?! See more at Divella Delights!!

Monday, April 29, 2013

Another Rose Quartz Bed Embroidered Cuff

I just can't seem to keep the pink ones around very long so I though I would offer up another one, this one being the third. This one is really stunning in person and I just can't wait to get it on the cuff! It has genuine Peridot and Rhodochrosite nuggets along with the center 3 Rose Quartz stones and my standard high quality Miyuki Seeds. Very feminine with lots of sparkle! I think I will call it Rose Tapestry. What do you think?
Be sure and stop by Divella Delights to see my newest cuffs....and OH yes, the Mother's Day sale is going on now!

Tuesday, April 9, 2013

Easy Tips to Organize your Studio Space

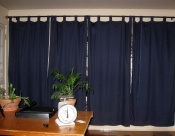
When we moved from Maine to Vermont and rented a house I was faced with creating studio space to work in. The house has a 20X27 great room off the kitchen and what used to be the living room in front of the house.

We decided that the old living should be my studio due to the size and amount of natural light it has with the 2 good size windows. In the center of one wall there are shelves, although they are very shallow. In my house in Maine I used cork boards with all my gems and pearls and that worked very well. I have my seed beads in tubes in tin cans (I like to re-use when possible) and I liked that as well. I have them separated into colors and sizes. In a rental house I had to be careful with anything I did, making sure I could restore it when we leave. I also wanted to be able to hide the shelves and corkboards as it is the first room you come into.


The narrow shelves turned out to be perfect to line up my seed beads on and made it easy to separate them by size with the #15’s on one shelf, #11’s on the next, and so on. I hung my corkboards on either side of the shelves. I wanted to be able to hide that whole set up and protect the gems, beads form light as well. I went out and bought a large curtain rod and panels of curtains. Blue is not the color I would have chosen, but I had to work with the wallpaper that is already there because, like I said it is a rental. The white panels were to sheer.


For my workspace I had some challenges. In Maine my husband built me a table that I could use as a sit/stand and I have a drafting chair that was perfect. The thing about those chairs though is that they do not go low enough for a normal table height, missing by just a couple of inches. I had (2) 7 foot tables but they were too low to work one for hours at a time. To remedy this we went out and purchased some beautiful Birch plywood and I arranged the tables in a “U” shape. This enables me to have my computer nearby, my workspace in front of the window and my light tent just to the right of my workspace.

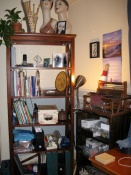
I purchased a bookcase and have all my crochet/knitting books, beading books and some other storage space. In the closet are my tubs full of yarn, my gift boxes and other miscellaneous items.

Under one table I have my shredder, file cabinet, storage for completed pieces and other supplies that I use often. A smaller bookcase at the end of that table houses tubs (plastic salad containers) full of other supplies such as lampwork, acrylic flowers and leaves, Swarovski crystals and pearls, etc…

On the table to my right I have my light tent, shipping station, paper cutter and other larger tools I use often. I do have some plants around just to keep things fresh and like I said there are 2 good size windows for sunlight and scenery.
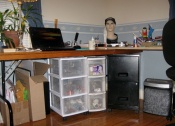


I will be happy when the house in Maine sells and we can look into buying a home in Vermont. For now though, this works great and I did not change anything making it very easy to move it all without having to do any repairs to the rental.

Meanwhile, come hang out with me at Divella Delights!


Saturday, March 30, 2013

Family of Beaded Cuffs


I am having so much fun with these Bead Embroidered cuffs! I get to use all sorts of my favorite goodies, gemstone cabochons, pearls, acrylic flowers, silver flowers and beads…the possibilities are limited only by my imagination!

I no longer have the pink one to show you but I will be working on another soon, a special order in fact! I am just waiting for a couple more supplies to come in, hopefully today.

I have the Rose Quartz Cabochons and I picked up more Blue Lace Agate too, I just love the color of those.

I hope this new foundation material I ordered works as well as the white stuff as it comes in 16 colors…we’ll soon see.

Have a Happy Easter for those of you who celebrate!

I’ll be back soon.
Be sure to visit me on my website, Divella Delights!

Wednesday, March 27, 2013

Alternative to Lacy's Stiff Stuff Beading Foundation?

I came across some Friendly Felt made by the Kunin Group and thought I would try it for foundation to see if it holds up as well as Lacy's Stiff Stuff.

I will be updating this post as I go through the process so you might want to check back throughout the day and evening hours.

Lacy's has been my go-to foundation for bead embroidery and while it is very dependable allowing me to bead right up to the edge it can get costly (6-pack of 5X8.5 inches runs around $14.00). The Friendly Felt is made in the USA from 100% post consumer recycled plastic bottles and runs around $10.99 for (12) 9X12 inch sheets. It also comes in a variety of colors while Lacy's comes in only white. I have dyed Lacy's before and was not really too happy with the results I obtained but then I only tried once. I have not yet attempted to dye the Friendly Felt.

Kunin Friendly Felt has the same stiff feeling as Lacy's but I am wondering if it will hold up as well. I have sewn into it very close to the edge and tried to pull the thread out towards the edge and it resisted very well and did not pull through. I used E6000 to attach my cabochon as always and it adhered nicely with no apparent damage to the felt. So far, so good.

Now onto the beading portion.

The threads are remaining nice and tight and the felt is quite easy to bead through.


The felt is holding up very well and is maintaining the stiffness needed for beading. The only thing I wonder about is the thickness when beading together with my backing which is ultasuede. We'll see!

Embroidered Bride's Cuff Completed!

At long last the Bridal cuff is complet. See more photos at Divella Delights!

Tuesday, March 26, 2013

Bridal Cuff, Ready to Attach

Here we have the finished beadwork all ready to attach to the cuff.

I have to trim the cuff a little so that it fits just right so the finished piece will be posted later tonight. I am hoping to get some better photos so you can see the ivory and white more clearly. It really is quite striking!

As it turns out, I really like the silver in this piece which is quite a surprise ot me beacuse at the onset I did not think I would.


Be sure to stop by Divella Delights to see the finished cuff later tonight!

Wednesday, March 20, 2013

Bead Embroidered Bridal Cuff


I wanted to do a Bridal Cuff but was lacking a center stone to use. This is where those beading books come in handy! I made a center flower and some leaves using one of the techniques in “The Beaded Garden” with some variation of my won and made the focal point for the beginning of my Bridal Cuff.


The photos are a little challenging because at the moment it is white on white and I am no photographer but you can see how handy those books are when you have to improvise.

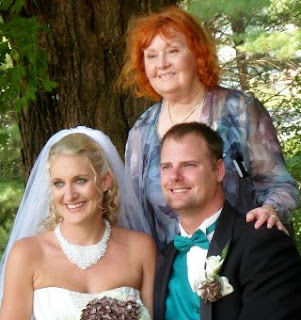
I plan to use a variety of shapes and sizes of seed beads in ivory and white as well as some beautiful little white pearls I have leftover from my daughter’s bridal necklace I made last year. I could not resist the chance to show her off so here she is wearing the necklace.
 

  I have some small silver flowers I will probably use too but if you have followed me at all, or if you bead yourself you know how the direction can change! First I will have to drill them as they have no holes in them yet. You can see them in the Blue Lace Agate Cuff.
Follow along with me at Divella Delights for the process and I will post the finsished photos here as well!